Search This Blog

Monday, May 28, 2012

A Break from the Kitchen: Brunch at the Ritz Carlton

by Mango

Panda had read about the brunch served at the Ritz Carlton Cafe, and we figured it would be neat to put on our fancy pants and eat at a fancy pants place. So we gathered together a few good friends, and worked out an eating strategy in advance. The buffet hours were 11:00 AM to 2:30 PM. Needless to say, we were there from start to finish. The Cafe itself was of course, pretty fancy. Perfect plate settings. Perfectly aligned silver chafers. Perfect presentation.


The actual brunch items - eggs benedict, waffles, made-to-order omelettes, bacon, sausage etc - were rather underwhelming. The lunch items on the other hand, were outstanding. Especially the lobster mac and cheese. Chunks of sweet lobster meat and peas amongst cheesy macaroni. We didn't get a good picture of it because we were too distracted by its deliciousness. I think there's a little bit visible in the upper right corner of the plate.


Other items worth mentioning: mushroom gnocci, fried oysters, and strawberry tomato gazpacho. There was also a traditional carving station that offered lamb and pork. And a seafood station that had succulent crab legs and raw oysters - this was my favorite part of the buffet. Clearly, there was a lot to choose from. So our strategy was essentially, Eat. Rest. Repeat. And I'd say it worked, because we even had room for dessert. The presentation was of course, fantastic.


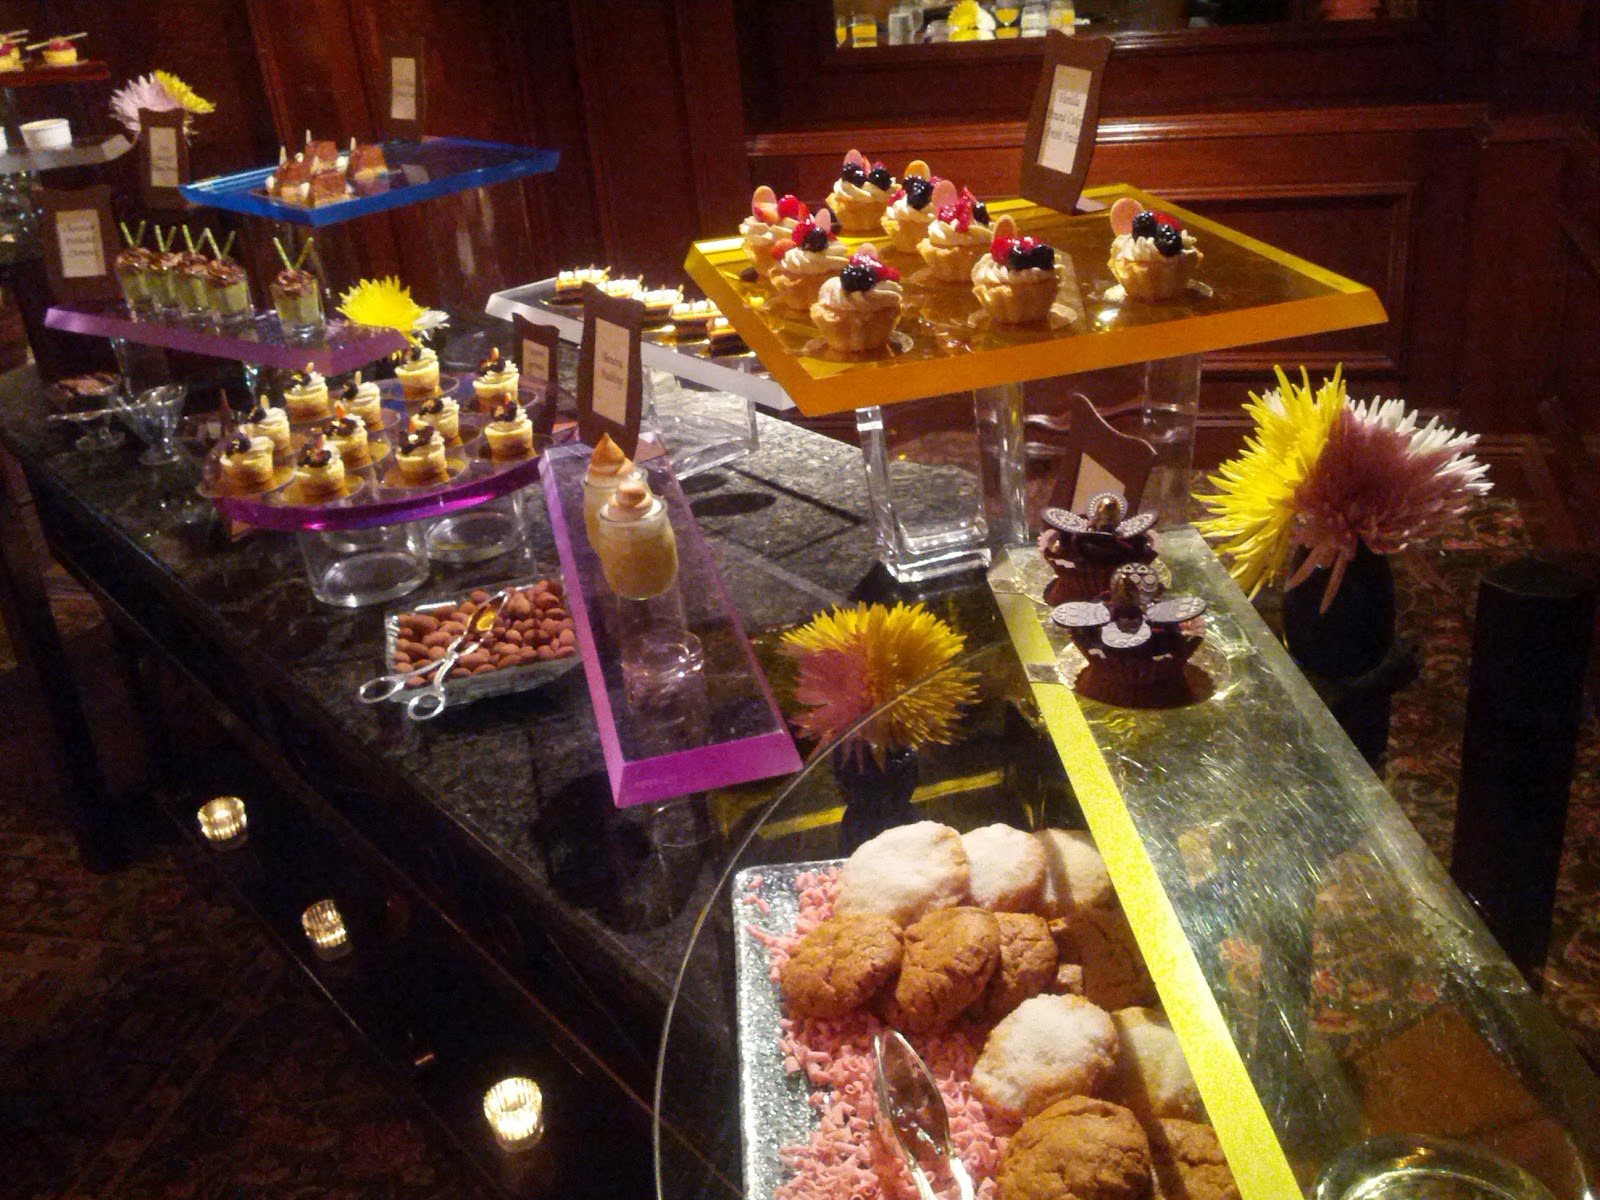
Unfortunately, it didn't quite measure up in taste. The banana pudding (isn't that little jar just precious?!) was good, and possibly my favorite out of whatever I sampled. Panda concurs.


I'm not sure how it's possible, but after dessert, we sampled a plate of cookies (Panda said the cookies were decent. I had no more room in my belly). We ended the meal with a nice cup of tea.


Overall, the experience was good. Most of the food items were just okay, but the service and atmosphere are excellent. It's all very perfect and fancy (I'd be lying if I said I wasn't tempted to leave a booger somewhere) but fancy can be good once in a while. And if you're with the right company, it can be a blast. Maybe it's something we'll do once a year.

Panda: That was all pretty good.
Mango: What was your favorite?
Panda: Definitely the lobster mac and cheese.
Mango: What are you getting for the second round?
Panda: I was thinking about getting an entire plate of mac and cheese, actually.

Quickie: Kimchi and Bacon Fried Rice

by Panda


This is just quick blog post about a dish that, while really simple, really makes me happy.  It combines both sides of my heritage using two ingredients - bacon and kimchi.  These two things were made for each other.  The bacon is smokey and unctuous, and the kimchi is hot and a bit sour.  They balance each other perfectly.  The only word of caution I would give is that they're both pretty salty, so when you make this dish, be sure to check it for seasoning before adding salt.

Oh, and if you want to take it over the top, throw a fried egg on top when it's all done.

Kimchi and Bacon Fried Rice

3c day old rice (we like brown rice... your mileage may vary)*
1.5c cabbage kimchi, chopped
1 large carrot, sliced thin
2 green onions, roughly chopped
1/2tbsp grated ginger
3 green thai chiles, minced
3 slices bacon, sliced
2tbsp toasted sesame oil
1tbsp soy sauce

Heat wok up over medium high heat. Add toasted sesame oil and bacon. Cook until the bacon just starts to crisp up (it should still have some chew to it). Add chiles, cook for about 30 seconds. Add carrot, green onion, and kimchi. Cook for about a minute. Add rice, stir to combine and to break the rice up into individual grains. Add soy sauce. Salt and pepper to taste.

* - If you don't have day old rice, use this trick from Ming Tsai: make a batch of rice, spread it out on a sheet tray, and then put it in the freezer for an hour (or in the fridge for a few hours). This will dry the rice out a bit before you cook with it.  Using slightly dry rice is absolutely crucial for good fried rice!

Panda: What should we have for dessert after fried rice?
Mango: What do we have?
Panda: We have butterscotch cupcakes, and that key lime gelato.
Mango: Let's have the gelato after dinner, because it would be nice after having something spicy.
Panda: So you're saying we should have cupcakes now, and gelato later.
Mango: .....yes.

Saturday, May 5, 2012

Offally Good: Braised and Fried Chicken Gizzards

by Panda

Like really, really good chicken nuggets.

I remember first trying chicken gizzards when I was a kid.  My first thought was that I was eating a ball of rubber bands - tasty rubber bands, mind you.  It felt like I had to chew forever to get these things down.  A chicken gizzard can be one of the chewiest things on Earth; after all, chickens use these things to pulverize their food with, so you can imagine how tough they probably are.  I had tried them several times after that, but I always had the same experience.  Tasty, but chewy.

I picked up some chicken gizzards on a whim from DeKalb Farmer's Market (our favorite place to shop for groceries).  How do you make these things chewable, I thought?  A light bulb went off in my head: braise them.  Braising will break down and tenderize the toughest meats.  Then another light bulb went off: I had wanted to make some fried chicken for a while, so why not braise them, then fry them?  Then a third light bulb went off, and I became a chandelier.


Brown = flavor.
I got my pot hot, then added some bacon fat (you do have a jar of bacon fat to cook with, don't you?)  I added the gizzards to the pot, and seasoned with salt and pepper. I let them cook until nicely browned, then added some chopped onions and allowed them to sweat.  Some garlic cloves went in, and then I had to deglaze the pan with something.  My favorite formula for a braise is browned meat, a flavorful liquid, something with a bit of tang to it, and aromatics.  I once again turned to beer to serve as my flavorful liquid.

This is some delicious stuff.  Highly recommended.
Beer went into the pot to deglaze.  I scraped up the bottom with a wooden spoon, then added chicken stock and a bundle of thyme and a quarter of a lemon.

Those chunks you see are cubes of frozen chicken stock melting into the braise. 
I brought this to a boil, then reduced it to a low simmer, covered it, and retired to the living room to enjoy the rest of my beer.  I checked on it every 20 minutes or so.  An hour and a half later the gizzards were ready.  Normally when I braise things, I like to leave them in the braise in the fridge overnight so that the flavors can marry and penetrate even more, but Mango and I were hungry; do this if you get a chance.

I removed the gizzards and put them in the fridge to cool.  So I was left with this really tasty braising liquid, and I was trying to figure out what to do with it.  One of my favorite things to do is to remove the inedible parts, then blend it to make it into a gravy, cooking it over heat again to thicken it up if need be.  I wasn't planning on having gravy with this meal, so what to do?   I knew that I was going to chicken fry these gizzards later... why not thicken the braising liquid and use it as the liquid component for the fried chicken coating?  I cooked it down until it was a glaze, then scooped it into a bowl, and it joined the gizzards in the fridge.

If you can run a wooded spoon through it, and it leaves a trail before coming back together, it's thick enough.

After everything had cooled down, I heated up some peanut oil in my cast iron pan (you do have a cast iron pan, don't you?)  Meanwhile, I got my other ingredients ready.  I mixed together some all-purpose flour and some corn starch, and added in some of my Panda's Standard Chicken Seasoning (just salt and pepper would be fine too, or whatever other spices you enjoy with chicken).  In another bowl I mixed together the braise reduction, buttermilk, and sriracha (you do have a bottle of -

Mango: *slap* Stop it.
Panda: OW!  OK.  Geeze.

I dropped the gizzards into the seasoned flour, then the liquid mixture, then back into the seasoned flour.

Be sure to shake off your excess flour.  A mesh strainer works great for this.
Buttermilk and sriracha with the braise reduction.  Any hot sauce will do, but sriracha is one of our favorites.  
Be sure to coat them well.  If you have some time, let them hang out in this mixture in the fridge for a while -  it'll make it taste even better.  The hot sauce doesn't add much heat, but it adds a ton of flavor.
All that was left to do was to fry them.  Remember, these were already cooked when I braised them!  So frying them only served to add a crunchy coating and to warm them back up.  I let them drain a bit on a paper towel set on a wire rack.  Meanwhile, Mango threw together a salad with some stuff we had on hand.

You do have a salad making Mango, don't you?
And there you go.  Dinner was served.


I was really happy with how these turned out.  The meat was nice and tender, and the coating was crunchy.  The braising reduction added a really nice flavor to the coating.  Mango's salad was a perfect accompaniment, especially at this time of year. It occurred to me that this would make a killer fried chicken salad... let me know if any of you try this. 

Braised and Fried Chicken Gizzards


1lb chicken gizzards
1tbsp bacon fat (or whatever oil you prefer)
1 bottle of beer (nothing too dark or hoppy)
1 medium onion, chopped
3 cloves garlic, smashed and peeled.
2c chicken stock
1/4 lemon
1 small bunch of thyme
2tbsp sriracha or other hot sauce
2tbsp buttermilk
2/3c all purpose flour
1/3c corn starch
*2 heaping tablespoons Panda Standard Chicken Seasoning (see below)
Peanut oil for frying

* or 1 heaping tbsp of salt + 1/2tbsp of pepper, or whatever seasoning you prefer

Heat a thick-bottomed pot over medium high heat.  Add bacon fat.   Season gizzards with salt and pepper, then add them to your pot.  Brown on all sides.  Reduce heat to medium and add your onions.  Cook the onions until sweated (translucent).  Add garlic and cook another minute more.  Turn the heat back on high, then add half of your beer to deglaze (save the other half for drinking).  Scrape the brown bits off the bottom of your pot with a wooden spoon.  Squeeze the lemon into the pot, then add the lemon, thyme, and chicken stock; if the gizzards are still exposed just add water until they are covered. Bring the mixture to a boil, then reduce the heat to a simmer.  Cover and let the gizzards braise for an hour and a half, checking every 20 minutes; if  the liquid is too low you should add more water.  When the gizzards are done, remove them from the braise and put them in the refrigerator.  Cook the braise over medium heat, stirring constantly, until it reduces to a glaze - you should be able to drag your spoon through it and leave a clear trail that is apparent for about half a second.  Pour the glaze into a bowl, and put it in the refrigerator to cool.

Pour enough peanut oil into a cast iron pan (or a heavy bottomed pan or pot that can be used for frying).  Combined the flour, corn starch and seasoning in a container with a lid.  Put the lid on and shake to combine.  When the braising reduction has cooled, remove about 4tbsp of it and put it into a bowl along with the sriracha and buttermilk.  Mix to combine.  Add the cooled chicken gizzards to the flour container, lid and shake to coat evenly.  Shake off excess flour using a mesh strainer.  Add the gizzards to the bowl with the liquid mixture.  Mix and coat evenly.  Return the gizzards back to the seasoned flour - add the lid and shake again to coat evenly.  When the oil reaches 375F (use an oil thermometer) add your gizzards.  Cook until the coating is nicely browned; note that the temperature used is higher than with standard fried chicken, so the coating will cook and brown quickly - be sure to turn the gizzards over quickly to avoid burning.  When done, place the gizzards on a wire rack to cool.  Add additional salt and pepper immediately.  Serve while hot.

Panda's Standard Chicken Seasoning


1 part peppercorns
1 part coriander seed
1 part fennel seed
1 part dried herbs* (I usually use herbs de provence, but rosemary or thyme are good too)
1 part kosher salt

Combined the first 4 ingredients in a spice grinder.  Grind until course.  Pour into a container and add kosher salt.  Stir to combine.

Wednesday, May 2, 2012

Offally Fun: Liver Chilli Fry

by Mango

I used to hate liver as a kid. But as an adult, I grew to tolerate it. And then, during a research sabbatical in Prague in 2010, I visited an old friend and his wife who prepared a local Czech dish of chicken livers stewed in a rich rosemary gravy, served with a side of crusty bread. I loved it. She kindly shared her recipe with me, and every time we've picked up chicken livers from the farmer's market, I've made her dish. This time though, I wanted to try something different, so I Googled liver recipes. A bunch of Indian spicy stir fry recipes (or chilli fry, as I'm used to calling it) popped up. I combined ingredients from reading some of these and the end result was delicious. Remember how I said Indian spices can overpower a dish? With chicken liver, that would be especially welcomed! Side note: a pound of chicken liver at the market cost us $2.97. Good for your wallet, and good for you. So, here are the ingredients:

Half a large onion, sliced
3 garlic cloves, chopped
Grated ginger (about a teaspoon’s worth)
5 Thai green chillies, chopped (you can adjust accordingly based on your heat preference)
1 medium or large tomato, chopped
1/2 tsp freshly ground black pepper
1 teaspoon turmeric
1 teaspoon red chilli powder
1/2  teaspoon garam masala 
A pinch sugar
Half a lemon
One pound of chicken livers
Oil and water as needed.


I forgot to include the tomatoes and lemon in this pic. Garam (hot) masala is a spice blend available in any Indian store or international market. The blend I used is my mom's homemade roasted version. My mom smuggles many an item into the country from overseas whenever she visits, whether I like it or not. A typical conversation with my mom before she visits from Dubai:

Mom: Shall I bring you some dried chillies and masala?
Mango: No mom, it's okay, thanks. I have Indian stores down the road from me and they have everything.
Mom: Okay, I'll bring it for you.
Mango: *Sigh*

I love her for it though. Anyhoo, fire up a pan on medium-high heat. Add a little oil and throw in onions, green chillies, garlic, ginger, and a pinch of salt. Fry until onions soften and start to brown, 5 minutes. Toss in tomatoes, stir, add in all of the black pepper, and half of the turmeric and half of the chilli powder. Stir fry for 5-10 minutes. Add a little oil or water as needed if it starts to dry out. 


While the onion and tomato base is frying (or prior to starting this dish!), prep the chicken livers. Rinse the livers thoroughly in cold water to get rid of excess blood. Trim fat and chop into bite-sized chunks.

Squeaky clean raw chicken livers after a good rinsing.

Trimming fat.
Add the ground pepper, generous pinch of salt, half of the turmeric and half of the chilli powder to the livers. Gently stir and let it sit for a couple of minutes. 

Move the fried onion and tomato base towards the pan's edges. Add a little oil to the pan's center and gently plop half of the chicken livers in the heated oil. Brown on both sides (about 1-2 minutes per side). 


Move the seared livers to the pan's edges and repeat the browning process with the remaining chicken livers. Then stir everything together, add the pinch of sugar, more salt if necessary, and continue to cook on high heat for further 5-10 minutes, stirring frequently. I like to leave the livers a little tender and dark pink in the middle, but you can cook it to your preference of doneness. Turn off heat, squeeze half a lemon over the liver chilli fry and serve. 


We had it over brown rice with a side of veggies. I was pleasantly surprised by this dish, will definitely make it again. If liver grosses you out, I'd encourage you to give it a try at least once. It can be delicious, and it packs a number health benefits. And it's CHEAP!


Mango: It's ready for your belly!
Panda: I'm glad you made veggies too. My gastrointestinal tract thanks you. 
(*Note: he had a very different word choice for GI tract, but to keep things non-disgusting, it was omitted).