Search This Blog

Wednesday, June 27, 2012

Bad Panda: The Ghetto Burger at Miss Ann's Snack Bar


by Panda

Wednesday is the day that my coworkers and I like to go out to eat somewhere.  We like to find new places to eat and try them out for lunch.  Today we decided to eat at Miss Ann's Snack Bar, home of the Ghetto Burger, which was named the best burger in the country by the WSJ in 2007.  My coworker Eric had tried eating at Miss Ann's on two separate occasions, and twice he had arrived too late; if you don't get in by a certain time, you just don't get a burger.

Determined to finally try this burger, my coworkers and I set out at 10:30 in the morning, hoping that we'd beat the lunch rush.  The Snack Bar is located on a run down section of Memorial Drive, and really is not much more than a shack - the only thing that would give it away would be the parking lot jammed full of cars.  When we arrived the place had still not opened, and the parking lot was actually still somewhat empty.  We took a seat in the patio outside and waited.  There were only two others ahead of us.

Eventually Miss Ann came to the screen door and waved us in.  I had heard stories about this lady before.  If you try to go inside before she calls you up, she kicks you out.  If you use your phone at the counter, she kicks you out.  The woman takes no shit.  God help you if you fart or tell a crude joke.

Miss Ann came around and took our orders.  The guy next to me said he wanted a cheeseburger and a drink.  When asked if he wanted fries, he said no.  Then he mentioned that he wanted cheese on his burger, I guess to make sure that she knew he wanted a cheeseburger. "You ordered a cheeseburger, didn't you?  Doesn't that come with cheese on it?"

I watched as Miss Ann cooked the burgers.  She reached into a bucket full of ground meat, pulled out an amount, patted it once between her hands, then slapped it on the griddle.  I'm pretty sure she has no idea how much each patty actually weighs, nor do I think she cares, but the patties were all the same size, so you could tell she'd been at this for a while.  A generous shake of seasoned salt went on.  She topped the patties with sliced onion (cut by hand, right over the burgers), then flipped the patties and smashed them down with her spatula.  More seasoned salt, more onion, more flipping, more smashing.  Smashing the burger against the flattop made me cringe a bit, because this can smash the juices right out of the burger, making it dry... but I had a feeling that she knew what she was doing.  Our fries were served up to us first, nice and hot from the fryer.  I threw on some season salt, and began eating them, drinking them down with the grape Fanta I had ordered.

The guy next to me was listening to some music on his headphones to kill some time.  Miss Ann motioned for him to take them off.  "Either you eat, or you listen to music."  He apologized.

On went the cheese, and then she started putting together the burgers.  First the bottom bun was covered with a layer of chili.  Then a patty.  It was just then that my brain made the connection - I had ordered a double.  When you look at one patty it's pretty big, and you think that that's your burger - but then you realize, "Oh God...  I ordered a double, didn't I?"  And then you see a second patty go on top, and you wonder what you were thinking.  Then comes the bacon (deep fried in a fryer next to the griddle), then a fat slice of tomato (again, cut by hand, right over the burger), then the lettuce, tomato, ketchup and mayo, and finally the top bun.

That's a normal sized styrofoam plate the burger is sitting on.
Miss Ann is notoriously against cell phone use, but I just had to ask her helper if I could take a picture of my burger.  "It's your burger, isn't it?"  That was as good of a green light as I was going to get, so I managed to snap off a few shots before I felt like it would be a good idea to put my phone away.

The first thing I thought when I bit into this burger - it was good.  Nevermind that it was as big as my head... it was tasty.  The patties, although lacking a crust and cooked to almost well-done, were juicy and had a great beefy flavor.  The onions were nicely griddled.  The slathering of chili on the bottom of the burger added some additional moistness and flavor, and didn't seem to disintegrate the bottom of the bun like I thought it would.  I'm not sure why I was surprised that it actually tasted good - maybe I was just thinking that I was getting quantity vs. quality here.  Apparently you can still get both.  Now, is this a Bocado burger?  Holeman and Finch?  No.  But it's not trying to be, either.

 
The guts of a Ghetto burger.

Seriously, what was I thinking?  This is a ton of food.
I don't know why... maybe it was because I didn't want to disappoint Miss Ann, or maybe it was because I wanted to prove to my coworkers that I could, but I was determined to eat all of this.  And so I did.


Me after eating my entire meal.
I waddled out of Ann's, feeling as though I had just set off a nuclear bomb in my gut.  Totally worth it, but I might ask for a to-go box next time.

I've heard rumors that Miss Ann was thinking about selling the establishment.  I'm not sure when or if this will happen, but you may want to go check it out soon.  Arrive early, be polite, and don't do anything that might get you kicked out.  And for God's sake, ask for a to-go box.

Get there early.
Panda: I was bad.
Mango: What did you do?
Panda: .....
Mango: Sigh. What did you eat?
Panda: I DID IT FOR THE BLOG.


Sunday, June 24, 2012

We Be Jammin': Cherry and Chocolate Cherry Jam

by Panda


I have always been fascinated by fruit.  I'm one of those people who will get excited when he sees a fruit tree with fruit on it (and will likely steal some when no one's looking).  I just think it's amazing that you can pluck food off of a tree... Some people think that's a little weird, but in this day and age, where everything comes from the grocery store, it's a bit of a revelation when you can actually see where something comes from.  I feel this way about meat, too, but that's an entirely different discussion.
To add to my fruity fascination, I had always thought that jam was a pretty mysterious, magical thing.  I just assumed that it was a difficult thing to do.  Then I tried it.  I think it's one of those things that people put in the same category as bread making; once you actually do it, you stand there for a second scratching your head, because you could swear it's got to be more complicated than it actually is.

Mango and I found ourselves with two bags of cherries from the farmer's market, and cherry jam is one of my favorite things.  Additionally, I now had an opportunity to make something that I had wanted to try making for a long time.


I keep a couple of boxes of pectin on hand for making jam.  I really like the no sugar pectin... I still put sugar in my jam, but the no sugar pectin is much more forgiving than regular old pectin.  Normal pectin requires a certain amount of sugar to set up properly, but no sugar pectin is treated so that it doesn't need the sugar for this to happen.  If you like your jam less sweet, just add less sugar, and the stuff will still work.  Additionally, most boxes of pectin come with recipes inside, which is handy, because different fruits require different amounts of ingredients.  I usually tweak the recipe to suit my tastes (e.g. less sugar, or replacing some of the sugar with honey).


The first thing I had to do was pit our cherries.  We don't have a cherry pitter - I just use a chop stick.  Use the small tip of the chopstick to poke a hole in the end opposite of where the stem would be.  Then place the large end of the chopstick against the stem-end, and push - the pit should pop right out.  Once I got all of them pitted, I threw them into a pot along with some lemon juice, and brought them up to heat over medium heat.


I like my jam chunky, so I leave the cherries whole and mash them up a bit later on.  If you  like a different texture, just cut your cherries up prior to adding them to the pot.


Meanwhile, I mixed some pectin up with about 1/4c of the sugar the recipe called for.  This is to help the pectin mix evenly throughout.


Pectin mixed with 1/4c sugar
I will often replace about half of the sugar a recipe calls for with honey, just because I like the taste.

Honey plus the rest of the sugar.  Lube your bowl and measuring cup with a bit of oil prior to adding the honey - it makes getting the honey out much easier.

Just add the pectin mixture to the fruit, bring to a boil, add your honey + sugar, and bring to a boil again.  I also like to add a pinch of salt... just as desserts benefit from a little salt, I think jam does as well.


Now since I added honey, and also liquid in the form of lemon juice (I feel that lemon juice helps brighten the flavor of fruit), I added the additional step of bringing the heat down and allowing the mixture to simmer uncovered for about 5 minutes, stirring often.  Honey is about 20% water, so I wanted to cook a bit of the water out so the jam would be the right consistency.  I may also buzz it up a bit with my stick blender, for a few seconds, to distribute some of the fruit a little more evenly (totally optional and up to personal preference).


Canning


This is a pretty important step, so I decided to put this in its own section.  If you'd rather keep your jam in the refrigerator or the freezer then you don't really need to bother with this.  So why bother?  It lets you store your jam on the shelf, at room temperature, which frees up room in your fridge/freezer.  You can keep jam around for a year or more without having to dig around in the deep freeze for it, and you can give your jam away as gifts (which we do quite often).  It's also a pretty easy process, as long as you remember to follow the necessary steps.

The most important thing to remember is that everything has to be clean.  You should wash everything, obviously, and also run your jars and lids through the dish washer (no detergent, by themselves) to sanitize them.  Just leave them there until you're read to use them.

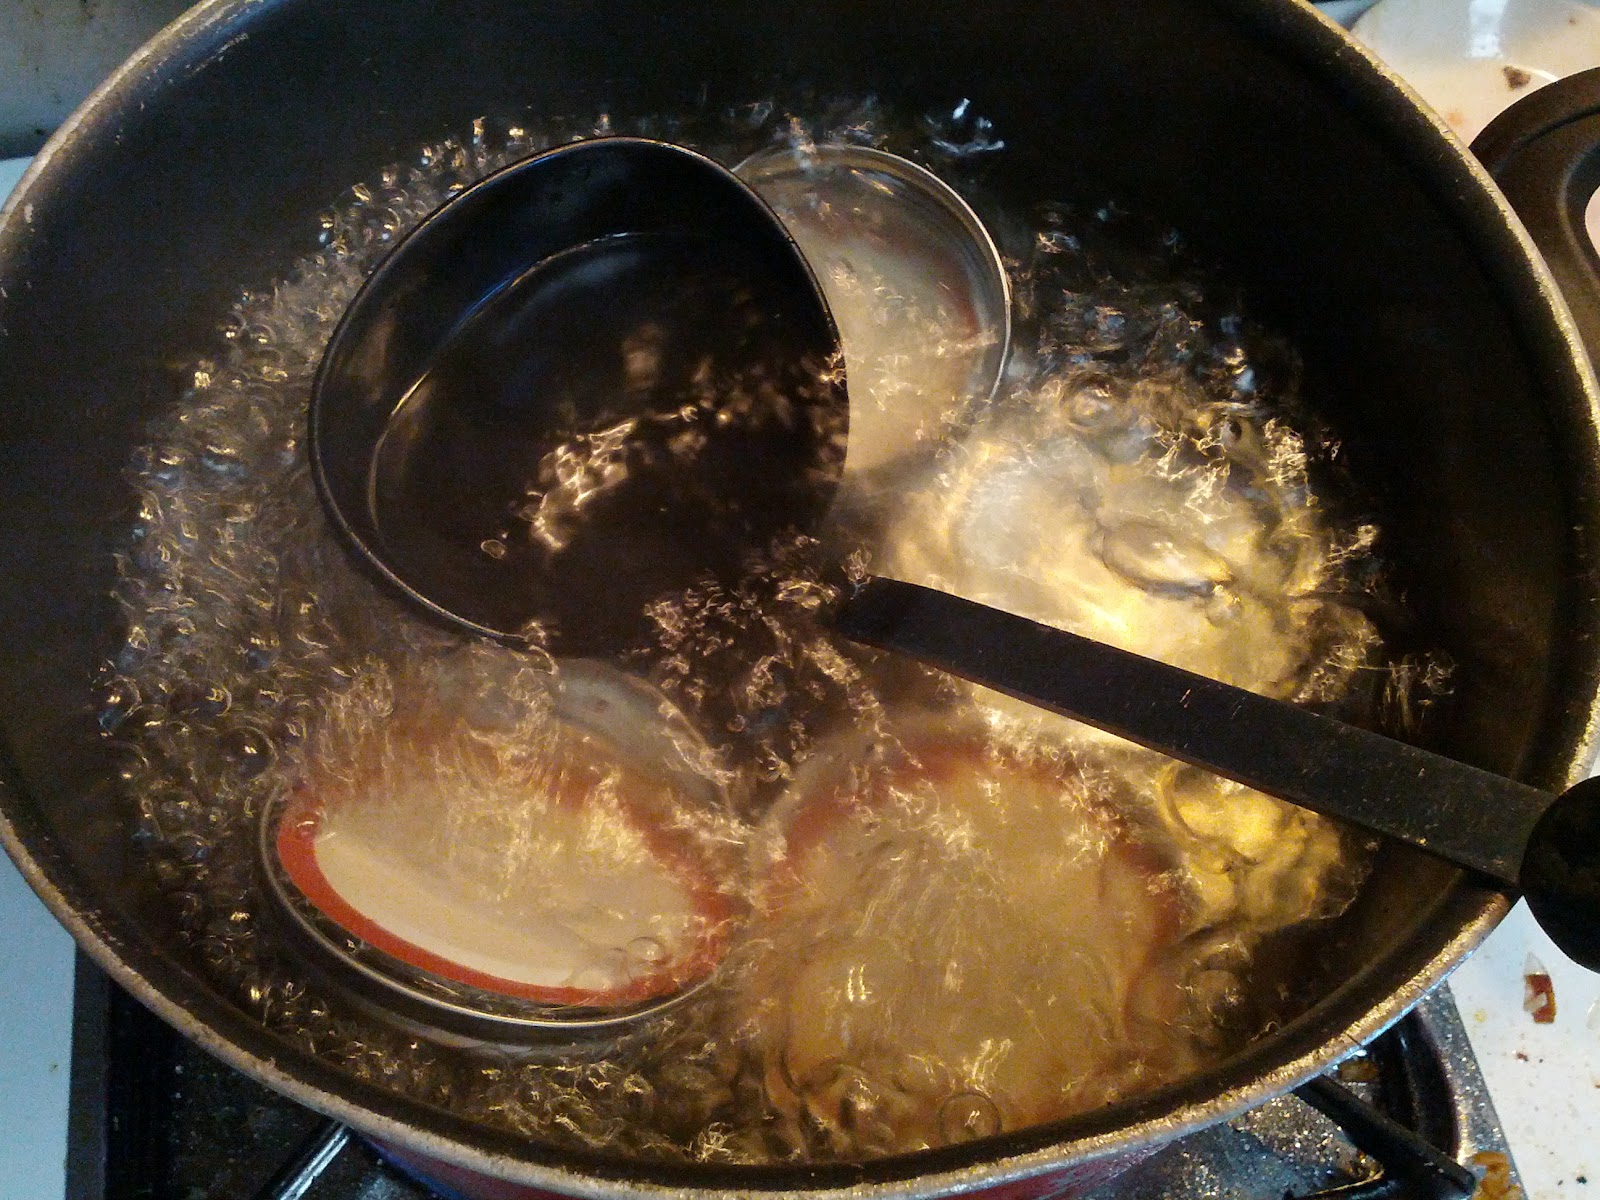
Utensil soup?  Lids and utensils in a pot of boiling water.

When I'm ready to make jam, I put the lids of the jars and any utensils I'm going to use (my funnel and ladel) into a pot of water.  I bring the pot up to a boil, then let it simmer until I get the jam ready.  This keeps everything nice and sterile.

Jars like this are available at most grocery stores, along with other canning supplies.  Be sure to get the jars specifically for canning (the lids with the ring that screws on over them).  Picking up an extra box of rings + lids is a good idea, too, in case the seal on one of them goes bad.

I picked up this collapsible silicone funnel from the store for about $2.  The opening was a bit smaller, but since it was made of silicone I was able to cut it so that the opening fit just inside of my mason jars. When your jam is hot and ready, remove a jar from the dishwasher, fit your funnel onto the mason jar, ladle the jam in, then remove the funnel and seal the jar up with one of the lids.  Be sure to do all of this while the jam is still nice and hot.

And now for the thing I had wanted to try for a long time... chocolate cherry jam.  As I ladled the jam into the jar, I simply alternated layers of hot jam and chocolate chips (the top layer being jam).  I couldn't wait to break into this.  And the best part?  Mango doesn't like fruit mixed with chocolate, so I'd have it all to myself :D

Once all of your jars of jam are sealed up (make sure the lids are tight, but don't crank them so hard that you won't ever get them open again), get your water bath ready.  There are canning rigs (pots + racks) available for this, but, if you don't have this equipment, just do the following.  You'll need a pot wide enough to accommodate your jars, and tall enough so that they will sit in the pot a few inches below the lip.  Place two clean dish towels inside the pot so that they evenly cover the bottom of the pot and come up on the sides a bit.  Then place your jars inside the pot, and fill the pot with water so that the water comes at least an inch above your jars.

The dish towels act as your rack, keeping the bottom of the jars from touching the pot; if they were to touch it they might end up shattering.

Once this is done, bring your water up to a boil, lower to a simmer, and cook for 20 minutes.  Most recipes will call for 10 minutes, but I feel that 20 minutes really ensures that everything will be thoroughly sanitized.

Louis Pasteur would be proud.

Once it's done, shut off the heat, and just leave your jars in there until they're cool enough to remove.  Then store them in a nice dark spot for 24 hours without moving them around (so that the pectin can set).

Waiting sucks.  But, as Alton Brown is fond of saying, your patience will be rewarded.

Oh, look.  There's jam stuck to my ladle.  Guess I'll have to lick it off - don't want to waste any.
Cherry jam on the left, chocolate cherry on the right.
When the jam begins to cool you'll hear a pleasant "thunk" - that's the vacuum being created by the air cooling inside the jar, pulling the top of the lid in so that it becomes concave.  In this particular instance I only heard one thunk... my chocolate cherry jam didn't form a proper seal.  You can test this by tapping the top of the jar; a proper seal will ring with a higher pitch, and an improper seal will have a lower pitched, dull sound to it.  Additionally, the lid won't be concave like it should be.  I'm pretty sure this happened because I put too much jam in the jar.  No need to panic, just follow these steps (be sure to do this within at least a day of when you filled the jar):
  • Remove your jam from the jar, put it in a small pot and slowly bring it up to a boil.
  • Repeat the canning process you used above using a new jar and lid.
Finally!
We finally broke into the jam this weekend.  Home made cherry jam is extraordinary.  Chocolate cherry jam... wow.  Crazy good.  Definitely making it again.

Here is an additional resource that answers lots of canning questions.  Hopefully I've covered everything above, but it never hurts to have more info :)

Cherry Jam

3lb pitted cherries
1 box no sugar pectin
1.5c sugar (set aside 1/4c for mixing with pectin)
1.5c honey (use a lighter honey so it doesn't overwhelm the taste)
Juice of 1 lemon
Pinch of salt
Dark chocolate chips (for chocolate cherry jam)

Sterilize clean jars, lids and utensils in your dishwasher; hold jars until ready to fill.  Bring a pot of water up to a boil, then add the lids and utensils to the pot to keep them sterile (tongs can be used to remove lids and utensils when you need them).

Add fruit to a large pot along with the lemon juice; stir to combine.  Bring the fruit up to heat over medium heat.  Meanwhile, mix 1/4c of the sugar with the no sugar pectin.  Oil up a bowl with a bit of oil, then add the honey and remaining sugar to the bowl.  When the fruit is hot, add the pectin + sugar mixture, stir to combine, and allow the mixture to come up to a boil.  Add the honey + sugar mixture, and bring the mixture up to a boil again.  Lower the heat so that the mixture simmers and simmer for 5 minutes.

Fit funnel onto jar, then ladle hot jam mixture into the jar; be sure to leave about 1/2" of headspace at the top of the jar.  Fit on the lid + ring and tighten.  For chocolate cherry jam, alternate ladles of hot jam with a sprinkling of the chocolate chips, ending with a layer of jam on top.

Place clean dish towels in the bottom of a large pot.  Add jam filled jars.  Fill pot with water until the water is at least an inch above the jars.  Bring the water to a boil, then lower the heat and simmer for 20 minutes.  Shut off the heat, and leave the jars in the pot until they're cool enough to handle.  Remove jars and put them in a dark cool spot to allow the jam to set.

Mango: Wow... this is really good.
Panda: I know, I'm glad we picked up these cherries.
Mango: Too bad there's not enough to share with anyone... om nom nom nom nom nom.


Monday, May 28, 2012

A Break from the Kitchen: Brunch at the Ritz Carlton

by Mango

Panda had read about the brunch served at the Ritz Carlton Cafe, and we figured it would be neat to put on our fancy pants and eat at a fancy pants place. So we gathered together a few good friends, and worked out an eating strategy in advance. The buffet hours were 11:00 AM to 2:30 PM. Needless to say, we were there from start to finish. The Cafe itself was of course, pretty fancy. Perfect plate settings. Perfectly aligned silver chafers. Perfect presentation.


The actual brunch items - eggs benedict, waffles, made-to-order omelettes, bacon, sausage etc - were rather underwhelming. The lunch items on the other hand, were outstanding. Especially the lobster mac and cheese. Chunks of sweet lobster meat and peas amongst cheesy macaroni. We didn't get a good picture of it because we were too distracted by its deliciousness. I think there's a little bit visible in the upper right corner of the plate.


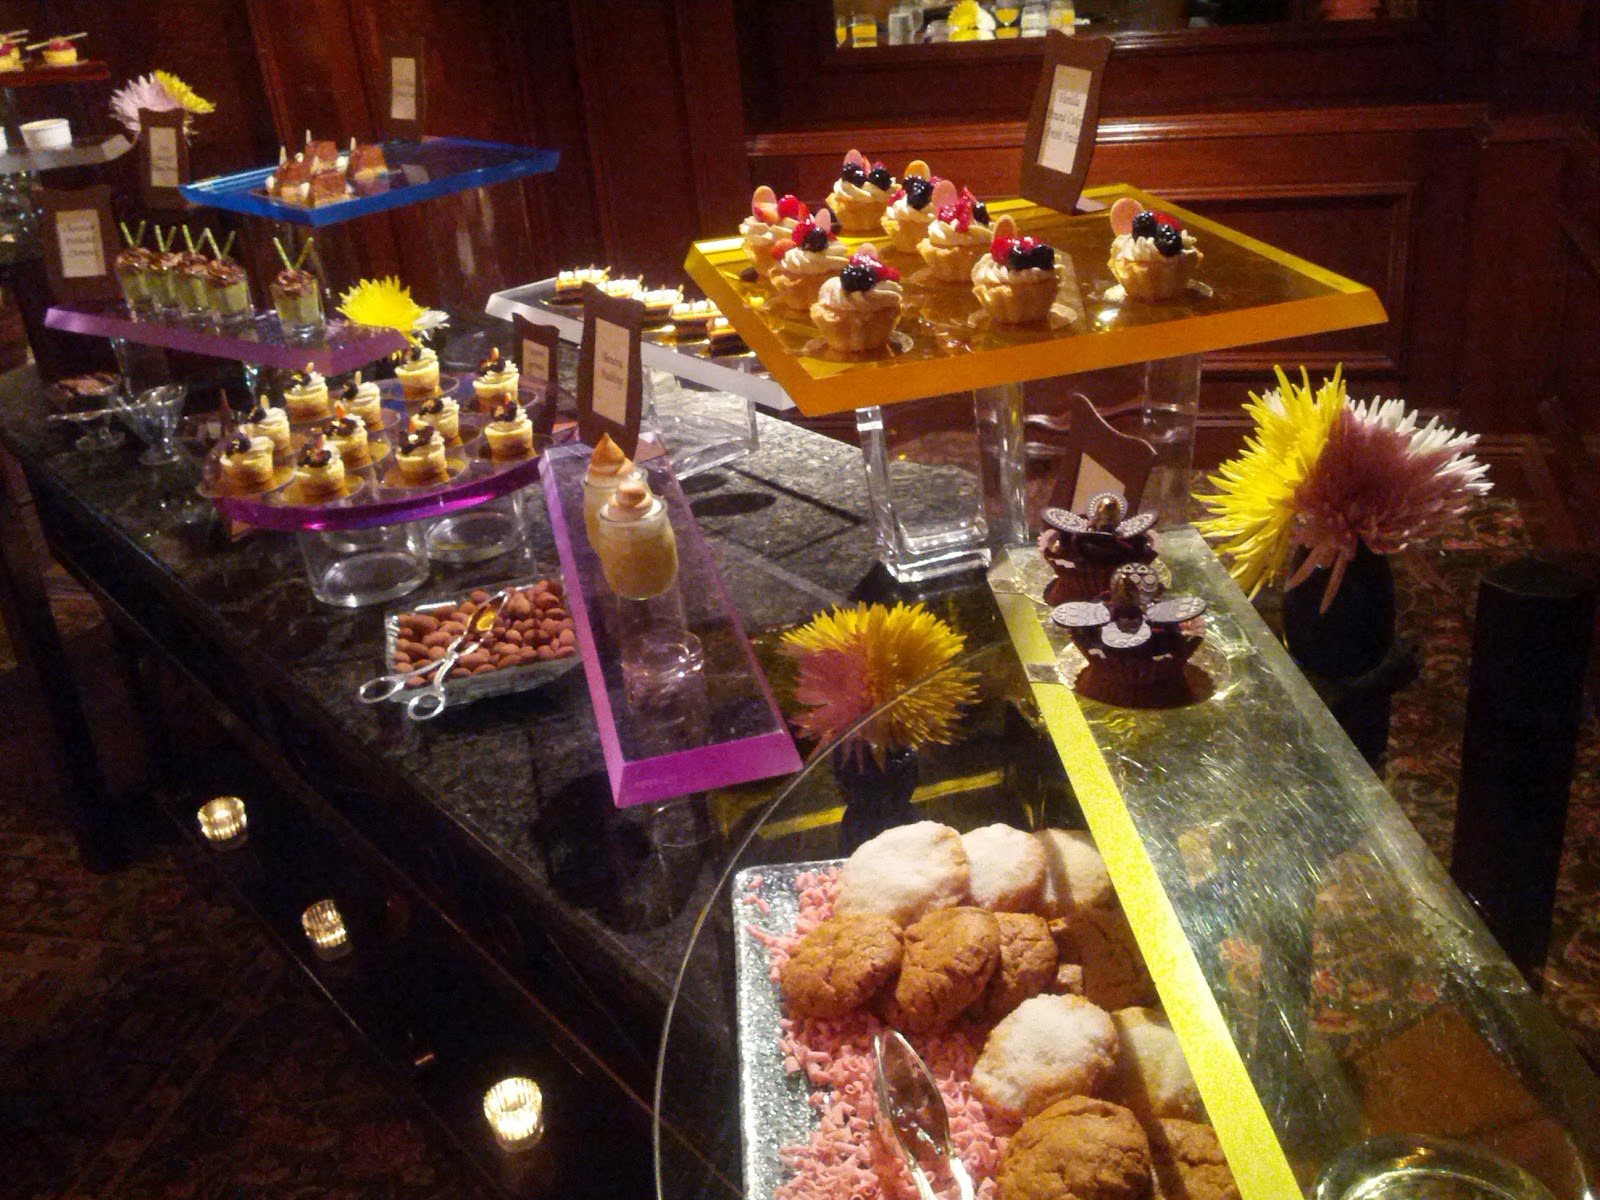
Other items worth mentioning: mushroom gnocci, fried oysters, and strawberry tomato gazpacho. There was also a traditional carving station that offered lamb and pork. And a seafood station that had succulent crab legs and raw oysters - this was my favorite part of the buffet. Clearly, there was a lot to choose from. So our strategy was essentially, Eat. Rest. Repeat. And I'd say it worked, because we even had room for dessert. The presentation was of course, fantastic.


Unfortunately, it didn't quite measure up in taste. The banana pudding (isn't that little jar just precious?!) was good, and possibly my favorite out of whatever I sampled. Panda concurs.


I'm not sure how it's possible, but after dessert, we sampled a plate of cookies (Panda said the cookies were decent. I had no more room in my belly). We ended the meal with a nice cup of tea.


Overall, the experience was good. Most of the food items were just okay, but the service and atmosphere are excellent. It's all very perfect and fancy (I'd be lying if I said I wasn't tempted to leave a booger somewhere) but fancy can be good once in a while. And if you're with the right company, it can be a blast. Maybe it's something we'll do once a year.

Panda: That was all pretty good.
Mango: What was your favorite?
Panda: Definitely the lobster mac and cheese.
Mango: What are you getting for the second round?
Panda: I was thinking about getting an entire plate of mac and cheese, actually.

Quickie: Kimchi and Bacon Fried Rice

by Panda


This is just quick blog post about a dish that, while really simple, really makes me happy.  It combines both sides of my heritage using two ingredients - bacon and kimchi.  These two things were made for each other.  The bacon is smokey and unctuous, and the kimchi is hot and a bit sour.  They balance each other perfectly.  The only word of caution I would give is that they're both pretty salty, so when you make this dish, be sure to check it for seasoning before adding salt.

Oh, and if you want to take it over the top, throw a fried egg on top when it's all done.

Kimchi and Bacon Fried Rice

3c day old rice (we like brown rice... your mileage may vary)*
1.5c cabbage kimchi, chopped
1 large carrot, sliced thin
2 green onions, roughly chopped
1/2tbsp grated ginger
3 green thai chiles, minced
3 slices bacon, sliced
2tbsp toasted sesame oil
1tbsp soy sauce

Heat wok up over medium high heat. Add toasted sesame oil and bacon. Cook until the bacon just starts to crisp up (it should still have some chew to it). Add chiles, cook for about 30 seconds. Add carrot, green onion, and kimchi. Cook for about a minute. Add rice, stir to combine and to break the rice up into individual grains. Add soy sauce. Salt and pepper to taste.

* - If you don't have day old rice, use this trick from Ming Tsai: make a batch of rice, spread it out on a sheet tray, and then put it in the freezer for an hour (or in the fridge for a few hours). This will dry the rice out a bit before you cook with it.  Using slightly dry rice is absolutely crucial for good fried rice!

Panda: What should we have for dessert after fried rice?
Mango: What do we have?
Panda: We have butterscotch cupcakes, and that key lime gelato.
Mango: Let's have the gelato after dinner, because it would be nice after having something spicy.
Panda: So you're saying we should have cupcakes now, and gelato later.
Mango: .....yes.

Saturday, May 5, 2012

Offally Good: Braised and Fried Chicken Gizzards

by Panda

Like really, really good chicken nuggets.

I remember first trying chicken gizzards when I was a kid.  My first thought was that I was eating a ball of rubber bands - tasty rubber bands, mind you.  It felt like I had to chew forever to get these things down.  A chicken gizzard can be one of the chewiest things on Earth; after all, chickens use these things to pulverize their food with, so you can imagine how tough they probably are.  I had tried them several times after that, but I always had the same experience.  Tasty, but chewy.

I picked up some chicken gizzards on a whim from DeKalb Farmer's Market (our favorite place to shop for groceries).  How do you make these things chewable, I thought?  A light bulb went off in my head: braise them.  Braising will break down and tenderize the toughest meats.  Then another light bulb went off: I had wanted to make some fried chicken for a while, so why not braise them, then fry them?  Then a third light bulb went off, and I became a chandelier.


Brown = flavor.
I got my pot hot, then added some bacon fat (you do have a jar of bacon fat to cook with, don't you?)  I added the gizzards to the pot, and seasoned with salt and pepper. I let them cook until nicely browned, then added some chopped onions and allowed them to sweat.  Some garlic cloves went in, and then I had to deglaze the pan with something.  My favorite formula for a braise is browned meat, a flavorful liquid, something with a bit of tang to it, and aromatics.  I once again turned to beer to serve as my flavorful liquid.

This is some delicious stuff.  Highly recommended.
Beer went into the pot to deglaze.  I scraped up the bottom with a wooden spoon, then added chicken stock and a bundle of thyme and a quarter of a lemon.

Those chunks you see are cubes of frozen chicken stock melting into the braise. 
I brought this to a boil, then reduced it to a low simmer, covered it, and retired to the living room to enjoy the rest of my beer.  I checked on it every 20 minutes or so.  An hour and a half later the gizzards were ready.  Normally when I braise things, I like to leave them in the braise in the fridge overnight so that the flavors can marry and penetrate even more, but Mango and I were hungry; do this if you get a chance.

I removed the gizzards and put them in the fridge to cool.  So I was left with this really tasty braising liquid, and I was trying to figure out what to do with it.  One of my favorite things to do is to remove the inedible parts, then blend it to make it into a gravy, cooking it over heat again to thicken it up if need be.  I wasn't planning on having gravy with this meal, so what to do?   I knew that I was going to chicken fry these gizzards later... why not thicken the braising liquid and use it as the liquid component for the fried chicken coating?  I cooked it down until it was a glaze, then scooped it into a bowl, and it joined the gizzards in the fridge.

If you can run a wooded spoon through it, and it leaves a trail before coming back together, it's thick enough.

After everything had cooled down, I heated up some peanut oil in my cast iron pan (you do have a cast iron pan, don't you?)  Meanwhile, I got my other ingredients ready.  I mixed together some all-purpose flour and some corn starch, and added in some of my Panda's Standard Chicken Seasoning (just salt and pepper would be fine too, or whatever other spices you enjoy with chicken).  In another bowl I mixed together the braise reduction, buttermilk, and sriracha (you do have a bottle of -

Mango: *slap* Stop it.
Panda: OW!  OK.  Geeze.

I dropped the gizzards into the seasoned flour, then the liquid mixture, then back into the seasoned flour.

Be sure to shake off your excess flour.  A mesh strainer works great for this.
Buttermilk and sriracha with the braise reduction.  Any hot sauce will do, but sriracha is one of our favorites.  
Be sure to coat them well.  If you have some time, let them hang out in this mixture in the fridge for a while -  it'll make it taste even better.  The hot sauce doesn't add much heat, but it adds a ton of flavor.
All that was left to do was to fry them.  Remember, these were already cooked when I braised them!  So frying them only served to add a crunchy coating and to warm them back up.  I let them drain a bit on a paper towel set on a wire rack.  Meanwhile, Mango threw together a salad with some stuff we had on hand.

You do have a salad making Mango, don't you?
And there you go.  Dinner was served.


I was really happy with how these turned out.  The meat was nice and tender, and the coating was crunchy.  The braising reduction added a really nice flavor to the coating.  Mango's salad was a perfect accompaniment, especially at this time of year. It occurred to me that this would make a killer fried chicken salad... let me know if any of you try this. 

Braised and Fried Chicken Gizzards


1lb chicken gizzards
1tbsp bacon fat (or whatever oil you prefer)
1 bottle of beer (nothing too dark or hoppy)
1 medium onion, chopped
3 cloves garlic, smashed and peeled.
2c chicken stock
1/4 lemon
1 small bunch of thyme
2tbsp sriracha or other hot sauce
2tbsp buttermilk
2/3c all purpose flour
1/3c corn starch
*2 heaping tablespoons Panda Standard Chicken Seasoning (see below)
Peanut oil for frying

* or 1 heaping tbsp of salt + 1/2tbsp of pepper, or whatever seasoning you prefer

Heat a thick-bottomed pot over medium high heat.  Add bacon fat.   Season gizzards with salt and pepper, then add them to your pot.  Brown on all sides.  Reduce heat to medium and add your onions.  Cook the onions until sweated (translucent).  Add garlic and cook another minute more.  Turn the heat back on high, then add half of your beer to deglaze (save the other half for drinking).  Scrape the brown bits off the bottom of your pot with a wooden spoon.  Squeeze the lemon into the pot, then add the lemon, thyme, and chicken stock; if the gizzards are still exposed just add water until they are covered. Bring the mixture to a boil, then reduce the heat to a simmer.  Cover and let the gizzards braise for an hour and a half, checking every 20 minutes; if  the liquid is too low you should add more water.  When the gizzards are done, remove them from the braise and put them in the refrigerator.  Cook the braise over medium heat, stirring constantly, until it reduces to a glaze - you should be able to drag your spoon through it and leave a clear trail that is apparent for about half a second.  Pour the glaze into a bowl, and put it in the refrigerator to cool.

Pour enough peanut oil into a cast iron pan (or a heavy bottomed pan or pot that can be used for frying).  Combined the flour, corn starch and seasoning in a container with a lid.  Put the lid on and shake to combine.  When the braising reduction has cooled, remove about 4tbsp of it and put it into a bowl along with the sriracha and buttermilk.  Mix to combine.  Add the cooled chicken gizzards to the flour container, lid and shake to coat evenly.  Shake off excess flour using a mesh strainer.  Add the gizzards to the bowl with the liquid mixture.  Mix and coat evenly.  Return the gizzards back to the seasoned flour - add the lid and shake again to coat evenly.  When the oil reaches 375F (use an oil thermometer) add your gizzards.  Cook until the coating is nicely browned; note that the temperature used is higher than with standard fried chicken, so the coating will cook and brown quickly - be sure to turn the gizzards over quickly to avoid burning.  When done, place the gizzards on a wire rack to cool.  Add additional salt and pepper immediately.  Serve while hot.

Panda's Standard Chicken Seasoning


1 part peppercorns
1 part coriander seed
1 part fennel seed
1 part dried herbs* (I usually use herbs de provence, but rosemary or thyme are good too)
1 part kosher salt

Combined the first 4 ingredients in a spice grinder.  Grind until course.  Pour into a container and add kosher salt.  Stir to combine.

Wednesday, May 2, 2012

Offally Fun: Liver Chilli Fry

by Mango

I used to hate liver as a kid. But as an adult, I grew to tolerate it. And then, during a research sabbatical in Prague in 2010, I visited an old friend and his wife who prepared a local Czech dish of chicken livers stewed in a rich rosemary gravy, served with a side of crusty bread. I loved it. She kindly shared her recipe with me, and every time we've picked up chicken livers from the farmer's market, I've made her dish. This time though, I wanted to try something different, so I Googled liver recipes. A bunch of Indian spicy stir fry recipes (or chilli fry, as I'm used to calling it) popped up. I combined ingredients from reading some of these and the end result was delicious. Remember how I said Indian spices can overpower a dish? With chicken liver, that would be especially welcomed! Side note: a pound of chicken liver at the market cost us $2.97. Good for your wallet, and good for you. So, here are the ingredients:

Half a large onion, sliced
3 garlic cloves, chopped
Grated ginger (about a teaspoon’s worth)
5 Thai green chillies, chopped (you can adjust accordingly based on your heat preference)
1 medium or large tomato, chopped
1/2 tsp freshly ground black pepper
1 teaspoon turmeric
1 teaspoon red chilli powder
1/2  teaspoon garam masala 
A pinch sugar
Half a lemon
One pound of chicken livers
Oil and water as needed.


I forgot to include the tomatoes and lemon in this pic. Garam (hot) masala is a spice blend available in any Indian store or international market. The blend I used is my mom's homemade roasted version. My mom smuggles many an item into the country from overseas whenever she visits, whether I like it or not. A typical conversation with my mom before she visits from Dubai:

Mom: Shall I bring you some dried chillies and masala?
Mango: No mom, it's okay, thanks. I have Indian stores down the road from me and they have everything.
Mom: Okay, I'll bring it for you.
Mango: *Sigh*

I love her for it though. Anyhoo, fire up a pan on medium-high heat. Add a little oil and throw in onions, green chillies, garlic, ginger, and a pinch of salt. Fry until onions soften and start to brown, 5 minutes. Toss in tomatoes, stir, add in all of the black pepper, and half of the turmeric and half of the chilli powder. Stir fry for 5-10 minutes. Add a little oil or water as needed if it starts to dry out. 


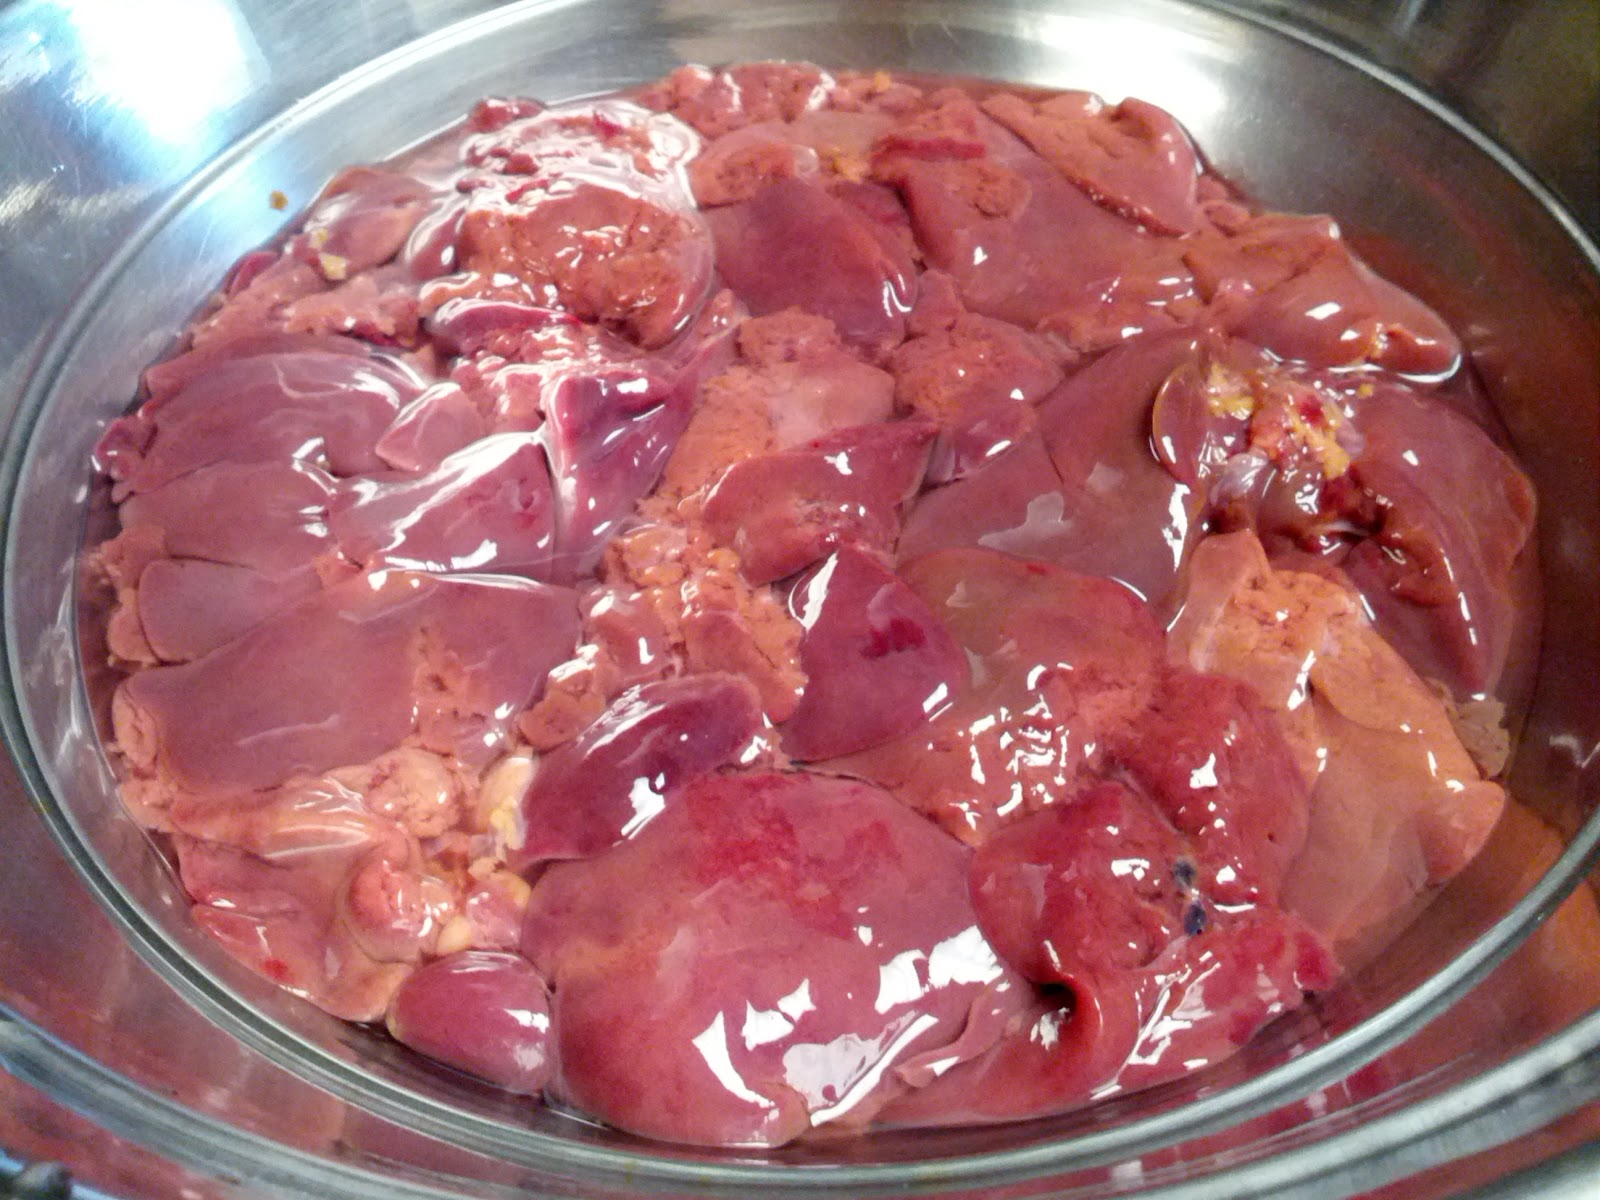
While the onion and tomato base is frying (or prior to starting this dish!), prep the chicken livers. Rinse the livers thoroughly in cold water to get rid of excess blood. Trim fat and chop into bite-sized chunks.

Squeaky clean raw chicken livers after a good rinsing.

Trimming fat.
Add the ground pepper, generous pinch of salt, half of the turmeric and half of the chilli powder to the livers. Gently stir and let it sit for a couple of minutes. 

Move the fried onion and tomato base towards the pan's edges. Add a little oil to the pan's center and gently plop half of the chicken livers in the heated oil. Brown on both sides (about 1-2 minutes per side). 


Move the seared livers to the pan's edges and repeat the browning process with the remaining chicken livers. Then stir everything together, add the pinch of sugar, more salt if necessary, and continue to cook on high heat for further 5-10 minutes, stirring frequently. I like to leave the livers a little tender and dark pink in the middle, but you can cook it to your preference of doneness. Turn off heat, squeeze half a lemon over the liver chilli fry and serve. 


We had it over brown rice with a side of veggies. I was pleasantly surprised by this dish, will definitely make it again. If liver grosses you out, I'd encourage you to give it a try at least once. It can be delicious, and it packs a number health benefits. And it's CHEAP!


Mango: It's ready for your belly!
Panda: I'm glad you made veggies too. My gastrointestinal tract thanks you. 
(*Note: he had a very different word choice for GI tract, but to keep things non-disgusting, it was omitted).